How Pipes Freeze in Winter and Why They Burst
In winter, when temperatures drop below freezing, the water inside pipes can turn to ice and expand. This expansion puts tremendous pressure on the pipes, which can cause them to burst. Here’s a closer look at how and why it happens:
Water expands by approximately 9% when it freezes. As it freezes, it expands. Since the pipe is rigid, it cannot expand with the ice. This builds up intense internal pressure in the pipe.
So if there is water inside a pipe and the temperature drops below 32°F/0°C, that water will start to freeze.
Eventually, the pressure becomes so great that it exceeds the pipe material’s strength limit. When this happens, the pipe bursts open. This releases all the built-up pressure instantly, but also causes water to go spraying out of the broken pipe.
Pipes that burst are often located along exterior walls, in crawl spaces, or in unheated areas of a home. These areas are most prone to reaching freezing temperatures. But any pipe exposed to cold air for long enough can freeze and burst.
The sudden water leakage that results from burst pipes can lead to enormous water damage in a home. Acting quickly to shut off the water and thaw pipes is crucial to minimise the damage.
Identifying Signs of Frozen Pipes Before They Burst
Catching a frozen pipe before it bursts is critical to preventing major water damage. Here are some common signs that your pipes may be frozen:
- Strange noises - You may hear gurgling, cracking, or hissing sounds coming from your pipes as the water inside starts to freeze and expand.
- Reduced water flow - Frozen pipes block water flow, so you’ll notice decreased water pressure at faucets and showerheads.
- Frost on pipes - Check pipes in unheated areas like basements or crawl spaces for ice crystals forming on the exterior.
- Discoloured water - Water coming out of faucets may appear cloudy or discoloured due to sediment being disturbed by the ice.
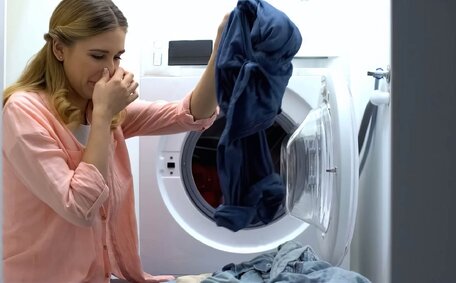
- Funny odour - You may notice a faint rotten egg or sewage smell coming from your faucets.
If you observe any of these signs, take action immediately. Shut off the water supply and gently warm the pipes with a hairdryer or towels soaked in hot water to thaw the ice. Calling a plumber promptly can also help assess and prevent burst pipes.
Insulating Pipes and Tanks to Prevent Freezing
Insulating water pipes and tanks is one of the best ways to prevent freezing in cold weather. Properly insulating exposed pipes provides a protective barrier that keeps them warmer.
Pipe insulation is available in various forms like tubing, sleeves, wraps or tapes made of materials like fibreglass, foam, or rubber. Choose an appropriate insulation thickness and material rated for plumbing use. Slide insulation tubing over pipes, or wrap insulation around them, securing it with tape.
Focus on insulating pipes and tanks in unheated areas like attics, basements, crawl spaces, garages, or near outer walls. Also insulate pipes under sinks located against exterior walls.
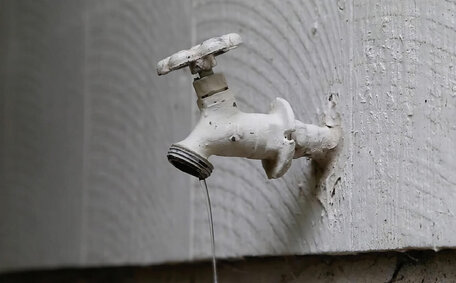
For outdoor hose bibs, install foam faucet covers. You can also insulate the valve and any exposed pipe sections leading to the hose bib with pipe wrap.
For water heaters, purchase a pre-cut insulation blanket tailored to your model. Secure it around the tank according to directions.
In extreme climates, consider heat tape or heat cables. These electric heating systems wrap around pipes and are thermostatically controlled to maintain a warm enough temperature to prevent freezing.
Proper insulation saves energy and heating costs while protecting your plumbing. It also allows you to lower the thermostat when away without fear of frozen pipes.
Sealing Air Leaks and Insulating Unheated Areas
Unheated areas in a home like attics, basements, crawl spaces, and garages are prime locations for pipes to freeze in winter. Sealing any air leaks that let in cold air is important.
Check for gaps or cracks around windows, doors, electrical outlets, wiring penetrations, and pipes or vents that pass through unheated zones. Use caulk, foam sealant, or weatherstripping to seal them up tightly.
Improving insulation also helps regulate temperatures. Inspect the insulation in walls, ceilings, and floors of unheated areas. Add extra fibreglass batt insulation to any sections that seem poorly insulated.
You can also wrap pipes in unheated areas with special insulation sleeves or hot water pipe wrap that is UL listed for plumbing use. This protects pipes from cold air.
Space heaters can provide supplemental heat on extremely cold nights. But make sure to choose safety-tested models and don’t leave them unattended. Proper sealing, insulation, and maintaining heat are key to preventing frozen pipes.
Keeping Home Temperatures Consistently Above Freezing
Keeping household temperatures consistently above 55°F (12°C) is crucial for preventing your pipes from freezing. When you maintain sufficiently warm air surrounding your pipes, it makes it much harder for them to reach freezing temperatures.
Use your home thermostat to control the ambient temperature. Set it to at least 55°F when you are away, and bump it up to 68-70°F when home. If you have programmable heating, you can set a schedule that warms the home right before you return.
Check that warm air is able to properly circulate around pipes. Open interior doors to allow heat to spread. Make sure furniture and storage boxes are not blocking vents or radiators.
Letting Faucets Drip to Prevent Freezing
Letting faucets slowly drip during extreme cold is a simple but effective way to prevent pipes from freezing. The steady trickle of running water keeps the water in the pipes moving. Moving water is less likely to freeze than still water.
Start by locating faucets farthest from your main water supply line, like those on external walls or in uninsulated areas. Turn them on just enough so drops come out every few seconds. A steady drip is sufficient.
Dripping faucets maintain water flow and pressure, preventing freezing in the connecting pipe. It also relieves pressure on the water supply system. Keeping water moving minimises the risk of ice blockages.
Note that letting faucets drip will increase your water bill somewhat. But this is well worth avoiding the far more costly and disruptive damage from burst pipes.
Monitor forecast temperatures and keep faucets dripping whenever the weather dips below freezing. It’s a simple preventative measure that can save your pipes during cold snaps.
Knowing the Location of Your Main Shutoff Valve
It’s critical to know where your home’s main water shutoff valve is located. This allows you to immediately turn off the water in an emergency like a burst pipe. The faster you can stop the flow of water, the less flooding and water damage will occur.
Take the time to locate the main shutoff valve for your home’s water supply. It’s typically near the water metre. The valve may be inside your home, in the basement, garage, utility room, crawlspace, or exterior of your home.
The shutoff valve is connected to the water supply line entering your home and allows you to stop all water flow. Make sure this valve fully closes and is in proper working order. Label it clearly so it’s easy to find in an emergency.
Train family members on how to quickly turn off the valve as well. Having multiple people familiar with the location and operation of the main shutoff valve ensures any one person can take swift action if pipes start bursting.
Knowing where your water shutoff is and how to use it can help minimise damage and make repairs easier if disaster strikes.
What to Do if You Have Frozen Pipes
If you suspect you have frozen pipes, immediate action is crucial to avoid burst pipes and flooding:
- Shut off the water supply at the main valve to isolate the issue and stop more water from entering the frozen section.
- Open all faucets connected to the frozen lines. This relieves pressure buildup.
- Locate where the pipes are frozen. Check unheated areas like basements, attics, crawl spaces, and exterior walls.
- Thaw pipes using a hair dryer on its lowest setting or applying towels soaked in warm water. Do NOT use an open flame.
- Apply heat until full water pressure is restored. Check faucets to confirm the pipes are thawed.
- Consider calling a plumber if you can’t locate or thaw the frozen section yourself.
- Once thawed, inspect pipes carefully for cracks or splits which indicate they need replacement.
Taking quick action to safely thaw frozen pipes can help you avoid catastrophic pipe bursts and flooding.
Thawing Frozen Pipes Safely and Effectively
When you have confirmed there is a frozen pipe, it’s crucial to thaw it gradually and delicately to avoid pipe bursting. Here are some effective methods for safe thawing:
- Use a hair dryer on the low heat setting. Keep the dryer 6-12 inches from the pipe and move it slowly back and forth along the frozen section. The gentle, dry heat will begin melting the ice inside.
- Wrap frozen pipes with towels soaked in hot water. Make sure the towels stay hot by continually replacing them or reheating them in a bucket of hot water. The moist heat will transfer into the pipes.
- Place a portable electric space heater near frozen pipes. Position it to blow warmth directly toward the affected area. Monitor the pipes for thawing.
- Install UL-listed heat tape or heat cables around the frozen section. These will safely apply electric heat tailored for thawing pipes.
In all cases, work slowly and cautiously. Apply only moderate heat over an extended period. Apply only moderate heat over an extended period.
Be patient and keep heating until full water flow is restored. If you’re unable to thaw the pipes yourself, call a plumber for assistance.
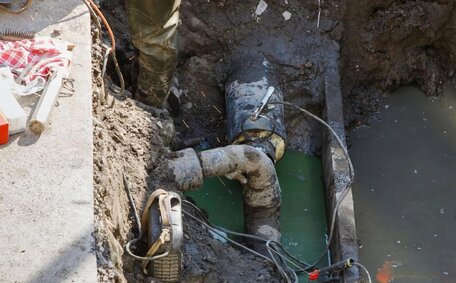
Dealing with Burst Pipes and Water Damage
Burst pipes can cause severe water damage if not addressed quickly and correctly. Here is what you need to know about dealing with burst pipes:
If you discover a burst pipe, immediately shut off the main water supply valve to your home. This will prevent additional water from flooding out of the break. Turn off any appliances connected to the burst pipe as well.
Check all areas of the home for where water may be leaking through ceilings and walls on lower floors. Place buckets and towels underneath active leaks to catch water until repairs can be made.
Call a professional plumber right away to inspect and repair the burst pipe. Trying DIY repairs on a burst pipe could make the situation worse.
After the burst pipe is repaired, start mitigating water damage. Remove any soaked carpets and padding. Use dehumidifiers, fans, and open windows to dry out the home and prevent mould growth.
Contact your insurance provider about filing a claim for the water damage. Be aware that the average burst pipe claim costs over $5,000, so it pays to take preventative measures against freezing.
With prompt response and the help of a professional plumber, burst pipe issues don’t have to lead to catastrophic damage. Take steps to lower your risk of frozen pipes in winter and know what to do if they occur.